Smiling Fish Crochet Plastic Bag Holder – Free Pattern PDF
A happy crochet fish plastic bag holder with an open-mesh body. Free 30-page pattern PDF with turquoise and pink versions.
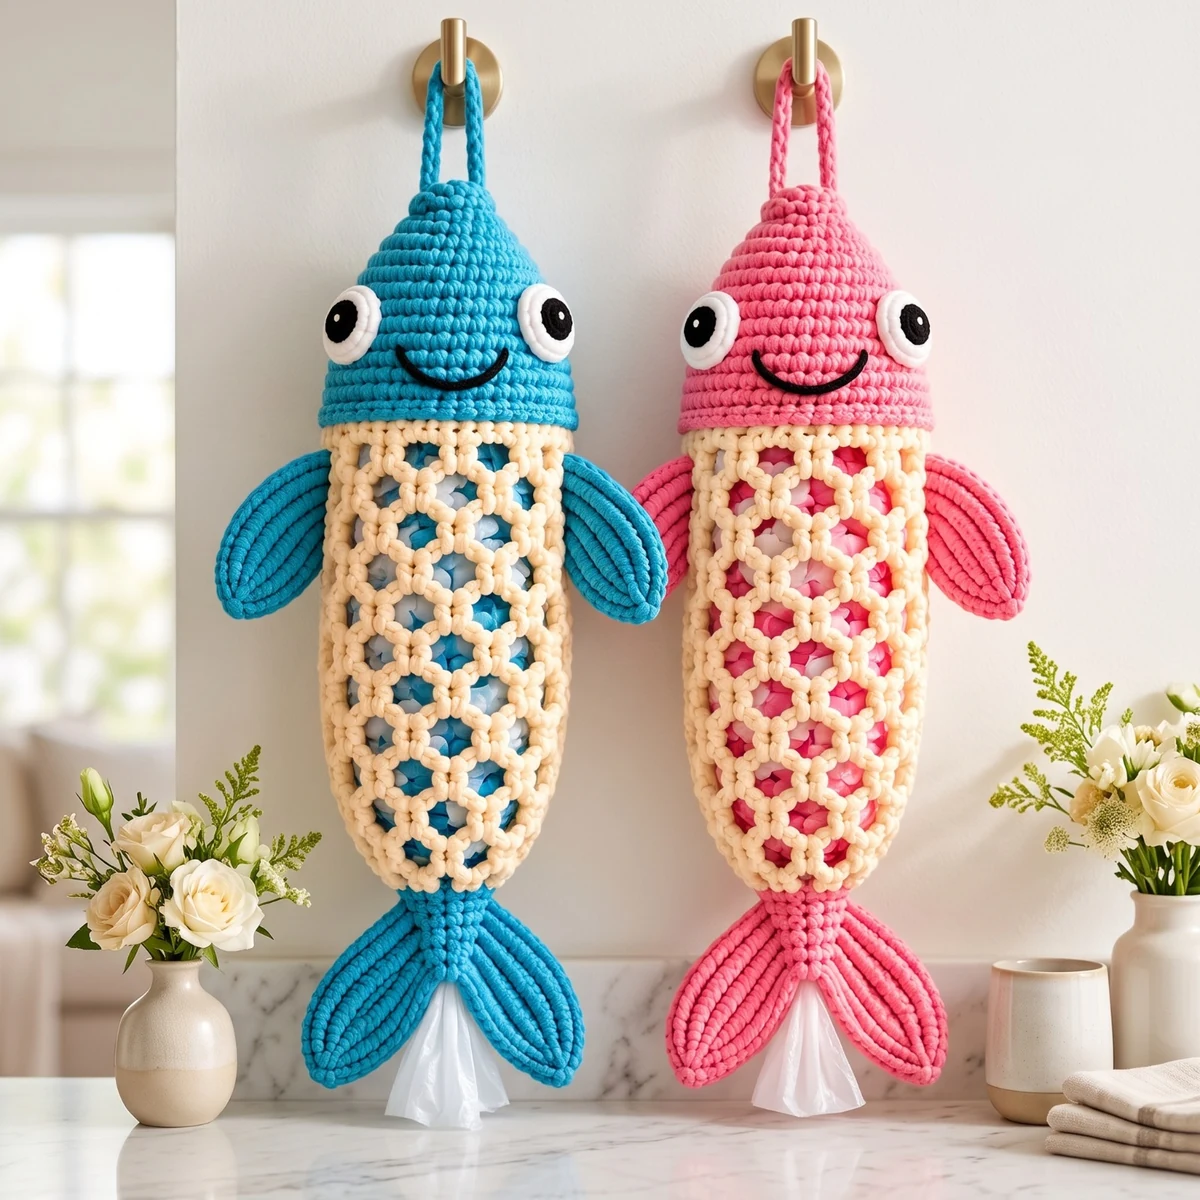
Crochet Plastic Bag Dispenser
BLUE + PINK COMPLETE COLORWAY EDITION
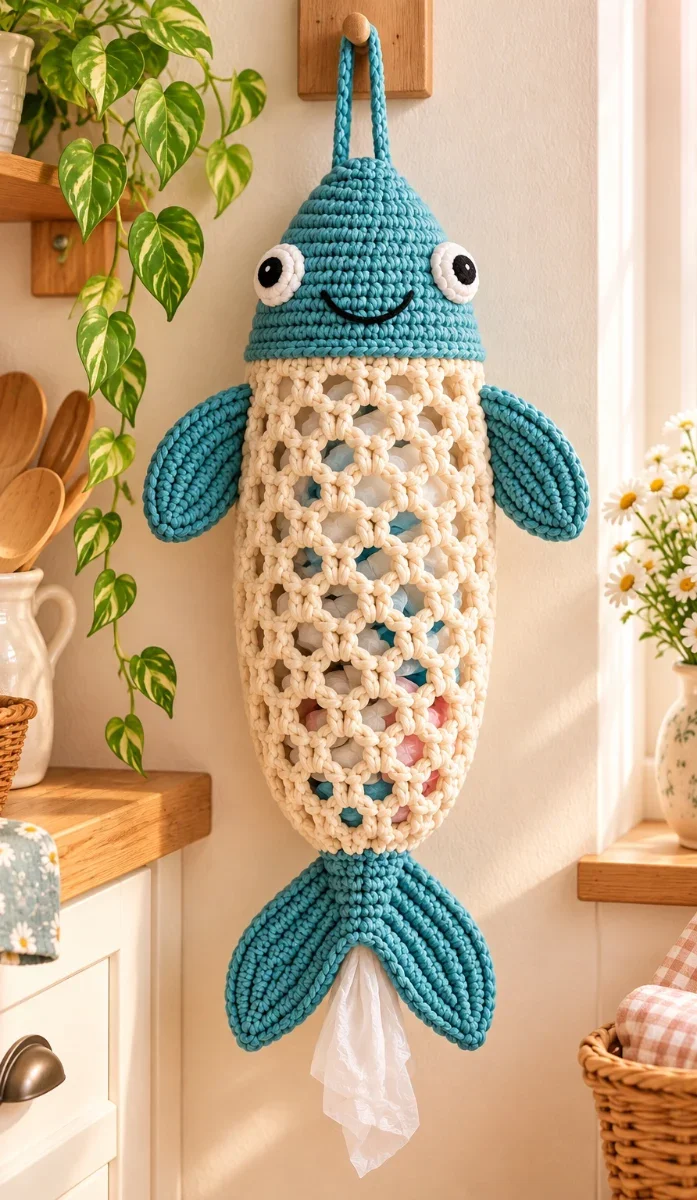
TURQUOISE + CREAM · PINK + CREAM
Complete method repeated for both colorways - one major construction step per page
HOOKMUSE PATTERN GUIDE
How to Use This Booklet
What is inside
This edition keeps the source method intact in structure, rewrites it in clearer language, and separates each construction stage onto its own page. The complete method is repeated twice: first for turquoise + cream, then for pink + cream.
Important: the source gives exact stitch counts for the mesh body, head, and hanging straps. It gives only a general shaping direction for the side fins and tail lobes, and it does not specify the total number of eye increase rounds. Those gaps are clearly marked instead of being invented.
Sections
Pages 3-4: common materials, gauge, abbreviations and construction map Pages 5-16: complete turquoise + cream version Pages 17-28: complete pink + cream version Pages 29-30: care, source notes and finishing reference
NOTE · Pattern method adapted and rewritten from the public MadeBy2Sisters tutorial linked on the final page.
Hookmuse visuals are original and are not copied from the source website.
HOOKMUSE PATTERN GUIDE
Materials & Gauge
Materials · Gauge
Yarn: medium-weight cotton yarn · Aim for approximately 14 double
- turquoise or pink for the colored fish · crochets x 8 rows in a 10 x 10 cm (4 x 4 parts · in) swatch.
- cream for the mesh body
- white for the eyes
- black yarn/thread for pupils and smile SIZE ADJUSTMENT FROM SOURCE
Hook: 3.5 mm (E) · For a larger fish, increase the starting chain for the cream mesh body in Tools: yarn needle, scissors, stitch · multiples of 4.
marker
Colorways
Blue · Pink · Cream
Before you start
Do not twist the starting chain when joining. Keep the mesh openings even. Count at the end of each round. If your swatch is too small, the source suggests going up a hook size.
Read through the full colorway section before beginning.
HOOKMUSE PATTERN GUIDE
Abbreviations & Construction Map
US crochet terms · Construction map
ch · chain
- 1. Make the cream mesh tube.
- 2. Add the solid cream joining edge. sc · single crochet
- 3. Crochet the colored head directly onto dc · double crochet · that edge.
- 4. Add two hanging straps. sl st · slip stitch
- 5. Make and attach two side fins.
dec · decrease · 6. Make two tail lobes and attach below the cream body.
st(s) · stitch(es)
- 7. Add eyes and optional smile.
- 8. Weave in ends, shape and hang. ch-1 sp · chain-1 space
NOTE · The source calls these “rows,” but the work is joined in rounds. This booklet keeps the source numbering while describing the construction clearly.
Turquoise + Cream Smiling Fish - Complete Method
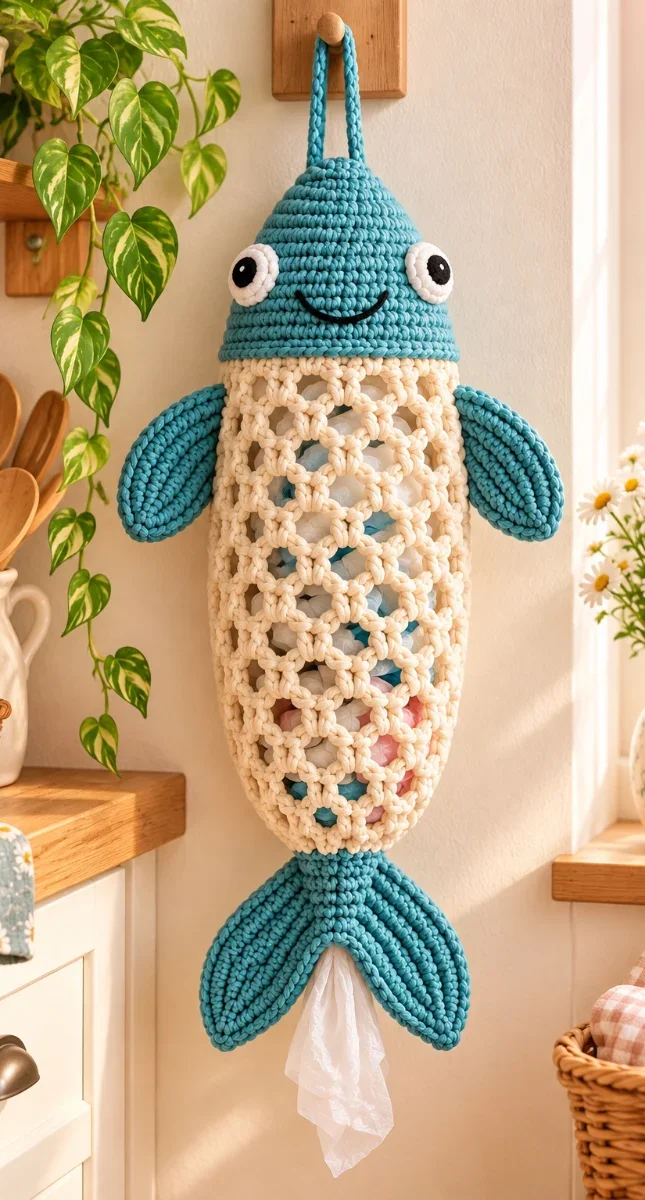
Color palette
Main fish color: turquoise + cream
Mesh body: cream
Eyes: white with black pupils
Hook: 3.5 mm (E)
Construction order
- 1. Cream mesh body
- 2. Solid joining edge
- 3. Colored head
- 4. Hanging straps
- 5. Side fins
- 6. Tail lobes
- 7. Eyes and smile
- 8. Final assembly
The pink edition uses the same stitch counts as the source blue version; only the turquoise yarn is replaced with pink.
NOTE · All instructions in this section are rewritten from the cited source method. Decorative visuals are original Hookmuse artwork.
ROWS 1-3
Cream Mesh Body - Start
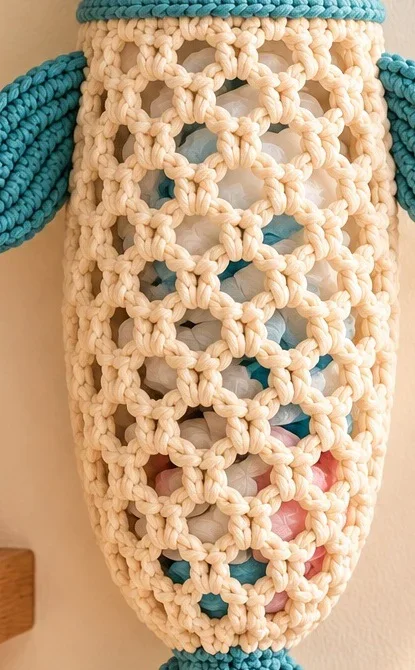
Step-by-step
- Row 1 - foundation: Ch 48. Join to form a ring, checking carefully that the chain is not twisted. Ch
- 1. Work 1 sc in each chain around. Join to the first sc. [48 sts]
- Row 2 - open mesh: Ch 4; this counts as the first dc + ch 1. Skip the next stitch. Work 1 dc in the following stitch, ch 1, skip 1. Repeat around and join to the 3rd chain of the starting ch-4. [24 mesh spaces]
- Row 3 - continue mesh: Sl st into the first ch-1 space. Ch 4. Continue around by working dc into successive ch-1 spaces with ch 1 between them. Join at the end. [24 spaces]
HOOKMUSE TIP
Lay the ring flat after Row 1. If it twists, correct it before continuing.
NOTE · The source wording for Row 3 is compressed. This page preserves its stated structure: work into the chain-1 spaces and keep 24 evenly spaced openings.
ROWS 4-25
Cream Mesh Body - Length
Step-by-step
Repeat the Row 3 mesh round for 22 more rounds.
Keep the same rhythm of double crochets separated by ch-1 spaces so that the tube continues with 24 mesh openings per round.
The source notes that the work may begin to cup slightly as the body length grows.
Maintain even tension and consistent spacing.
At the end of Row 25, do not change the stitch pattern yet; the solid joining edge is worked on the next page.
HOOKMUSE TIP
Count the mesh spaces periodically rather than waiting until the end.
NOTE · Rows 4-25 are not individually different in the source; they repeat the same mesh round.
- ROW 26
Cream Mesh Body - Solid Edge
Step-by-step
Ch 1.
Work 1 sc in each double crochet and 1 sc in each ch-1 space around the top of the mesh body.
Join at the end of the round. [48 sts]
Fasten off the cream yarn.
This solid edge is the base onto which the turquoise head is attached.
HOOKMUSE TIP
Before fastening off, verify that you have returned to 48 solid stitches.
NOTE · The source identifies this as the solid edge that prepares the mesh body for the fish head.
ROWS 1-5
Turquoise Head - Foundation
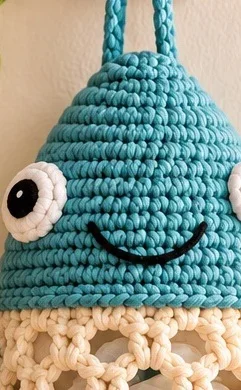
Step-by-step
Head Row 1:
Join turquoise yarn to the solid cream edge. Ch 1. Work sc evenly around the full edge. Join to the first sc. [48 sts]
Head Rows 2-5:
Work 1 sc in each stitch around for four more rounds. Keep the stitch count unchanged. [48 sts each round]
These plain rounds build the full-width portion of the head before the shaping decreases begin.
HOOKMUSE TIP
Place a marker at the start of each round even if you are joining rounds.
ROWS 6-11
Turquoise Head - First Shaping
Step-by-step
- Row 6: repeat sc 6, dec around. [42 sts]
Rows 7-8: sc in each stitch around. [42 sts each]
- Row 9: repeat sc 5, dec around. [36 sts]
Rows 10-11: sc in each stitch around. [36 sts each]
The alternating decrease and plain rounds create the rounded taper of the head.
HOOKMUSE TIP
Keep decreases snug so the taper stays smooth rather than forming visible gaps.
ROWS 12-16
Turquoise Head - Final Shaping
Step-by-step
- Row 12: repeat sc 4, dec around. [30 sts]
Rows 13-14: sc in each stitch around. [30 sts each]
- Row 15: repeat sc 3, dec around. [24 sts]
- Row 16: sc in each stitch around. [24 sts]
Keep the top opening accessible. The source specifically leaves this opening available for loading plastic bags.
CHECKPOINT
Pause here and count your stitches before moving to the next page.
NOTE · Do not close the head opening; the next step adds the hanging straps at this opening.
MAKE 2
Hanging Straps
Step-by-step
For each strap:
- 1. Ch 32.
- 2. Starting in the 2nd chain from the hook, work sc across. [31 sts]
- 3. Fasten off, leaving enough yarn for secure attachment.
- 4. Attach one strap to each side of the head opening so the straps sit opposite one another and can support the filled dispenser.
HOOKMUSE TIP
Attach the two straps at matching heights so the fish hangs straight.
MAKE 2
Side Fins
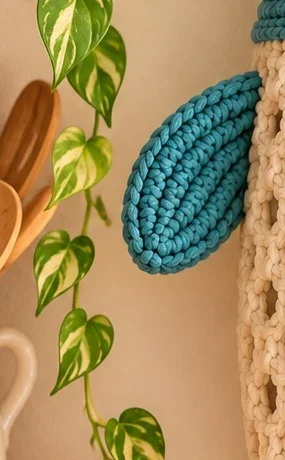
Step-by-step
For each fin, the source gives this starting
method:
- 1. Ch 10.
- 2. Starting in the 2nd chain from the hook, work sc across.
- 3. Continue shaping the fin by working increases and decreases evenly until a rounded fin shape is formed.
- 4. Fasten off with a sewing tail.
- 5. Sew one fin to each side where the turquoise head/body area meets the cream mesh body.
HOOKMUSE TIP
Make the second fin to match the first in length and curve.
NOTE · SOURCE LIMITATION: the tutorial does not give exact shaping rows, increase counts, decrease counts, or a final stitch count for the fins. This booklet does not invent them.
MAKE 2
Tail Lobes
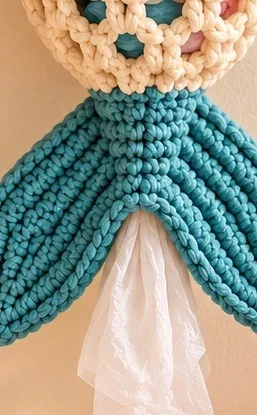
Step-by-step
For each tail lobe, the source gives this
starting method:
- 1. Ch 15.
- 2. Starting in the 2nd chain from the hook, work sc across.
- 3. Shape the lobe with increases and decreases to create a rounded outer edge.
- 4. Make a second matching lobe.
- 5. Join the narrow ends of the two lobes together, then attach the joined tail below the cream mesh body.
HOOKMUSE TIP
Lay both lobes side by side before sewing so the rounded ends mirror one another.
NOTE · SOURCE LIMITATION: exact tail shaping rows and stitch counts are not supplied in the source tutorial.
FACE DETAILS
Eyes & Smile
Step-by-step
Eyes - make 2:
Begin each white eye with 6 sc in a magic ring. The source then says to increase around to create a small white circle, but it does not state the exact number of increase rounds or the final stitch count.
Add a small black embroidered pupil to each eye.
Sew the eyes to the turquoise head.
Optionally embroider a curved smiling mouth with black yarn or thread.
HOOKMUSE TIP
Pin the eyes in place first so the expression looks balanced before sewing.
NOTE · SOURCE LIMITATION: only the eye starting round is exact; later eye increase counts are not specified.
FINAL ASSEMBLY
Finishing, Hanging & Loading
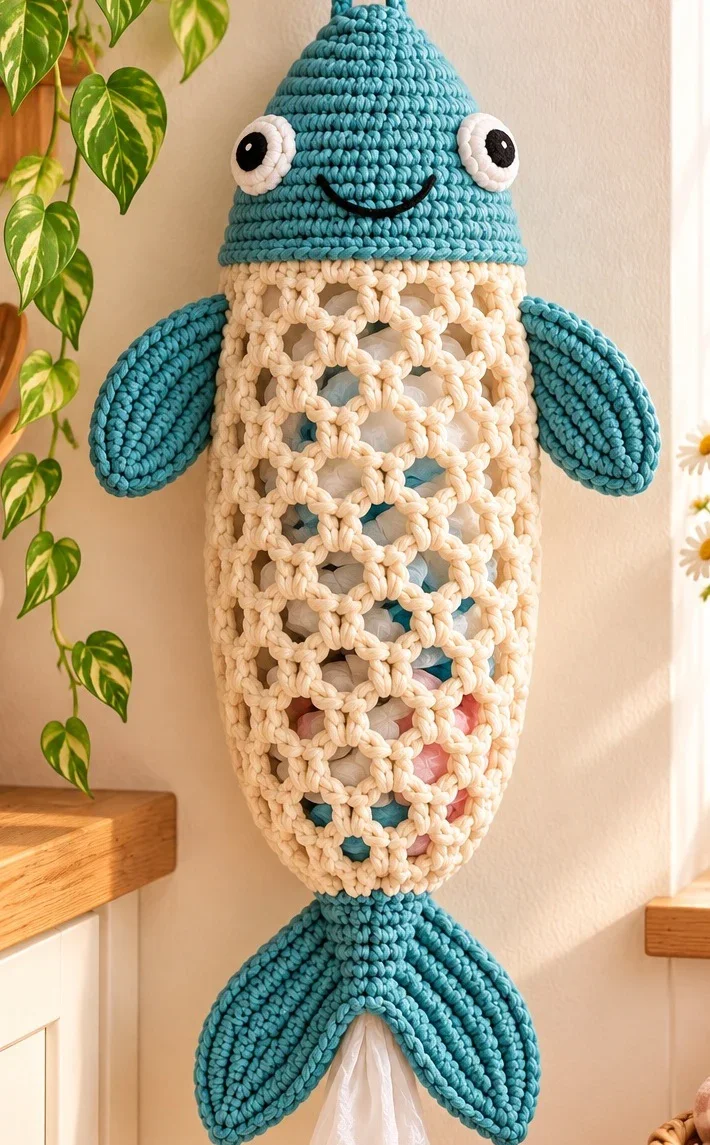
Step-by-step
- 1. Check every sewn join and secure it firmly.
- 2. Weave in all loose yarn ends.
- 3. Shape the fins and tail gently by hand.
- 4. Hang the fish from a sturdy peg or hook using the two straps.
- 5. Load folded plastic bags through the opening at the top of the head, as directed by the source tutorial.
Your turquoise + cream version is complete.
HOOKMUSE TIP
Do not overfill the dispenser; keeping the mesh relaxed helps preserve its shape.
NOTE · The Hookmuse illustration shows a bag extending below the tail for visual clarity. The source itself specifically states loading through the top opening and does not separately define a dedicated bottom dispensing opening.
Pink + Cream Smiling Fish - Complete Method
Color palette
Main fish color: pink + cream
Mesh body: cream
Eyes: white with black pupils
Hook: 3.5 mm (E)
Construction order
- 1. Cream mesh body
- 2. Solid joining edge
- 3. Colored head
- 4. Hanging straps
- 5. Side fins
- 6. Tail lobes
- 7. Eyes and smile
- 8. Final assembly
The pink edition uses the same stitch counts as the source blue version; only the turquoise yarn is replaced with pink.
NOTE · All instructions in this section are rewritten from the cited source method. Decorative visuals are original Hookmuse artwork.
ROWS 1-3
Cream Mesh Body - Start
Step-by-step
- Row 1 - foundation: Ch 48. Join to form a ring, checking carefully that the chain is not twisted. Ch
- 1. Work 1 sc in each chain around. Join to the first sc. [48 sts]
- Row 2 - open mesh: Ch 4; this counts as the first dc + ch 1. Skip the next stitch. Work 1 dc in the following stitch, ch 1, skip 1. Repeat around and join to the 3rd chain of the starting ch-4. [24 mesh spaces]
- Row 3 - continue mesh: Sl st into the first ch-1 space. Ch 4. Continue around by working dc into successive ch-1 spaces with ch 1 between them. Join at the end. [24 spaces]
HOOKMUSE TIP
Lay the ring flat after Row 1. If it twists, correct it before continuing.
NOTE · The pink edition uses the same cream mesh construction as the blue source version.
ROWS 4-25
Cream Mesh Body - Length
Step-by-step
Repeat the Row 3 mesh round for 22 more rounds.
Keep the same rhythm of double crochets separated by ch-1 spaces so that the tube continues with 24 mesh openings per round.
Maintain even tension and consistent spacing all the way through Row 25.
The solid joining edge is added on the next page.
HOOKMUSE TIP
Count spaces every few rounds to catch mistakes early.
NOTE · Rows 4-25 repeat the same mesh round; there are no separate row changes in the source.
- ROW 26
Cream Mesh Body - Solid Edge
Step-by-step
Ch 1.
Work 1 sc in each double crochet and 1 sc in each ch-1 space around the top of the mesh body.
Join at the end of the round. [48 sts]
Fasten off the cream yarn.
This edge becomes the base for the pink head.
HOOKMUSE TIP
Confirm 48 stitches before attaching the pink yarn.
ROWS 1-5
Pink Head - Foundation
Step-by-step
Head Row 1:
Join pink yarn to the solid cream edge. Ch
- 1. Work sc evenly around the full edge. Join to the first sc. [48 sts]
Head Rows 2-5:
Work 1 sc in each stitch around for four more rounds. [48 sts each round]
This is a user-requested color substitution:
pink replaces the turquoise yarn while all source stitch counts remain the same.
HOOKMUSE TIP
Use the same hook and tension as the cream body so the join stays smooth.
ROWS 6-11
Pink Head - First Shaping
Step-by-step
- Row 6: repeat sc 6, dec around. [42 sts]
Rows 7-8: sc in each stitch around. [42 sts each]
- Row 9: repeat sc 5, dec around. [36 sts]
Rows 10-11: sc in each stitch around. [36 sts each]
The shaping is identical to the turquoise version.
HOOKMUSE TIP
Keep decreases evenly spaced around the head.
ROWS 12-16
Pink Head - Final Shaping
Step-by-step
- Row 12: repeat sc 4, dec around. [30 sts]
Rows 13-14: sc in each stitch around. [30 sts each]
- Row 15: repeat sc 3, dec around. [24 sts]
- Row 16: sc in each stitch around. [24 sts]
Leave the top opening accessible for loading bags.
CHECKPOINT
Pause here and count your stitches before moving to the next page.
NOTE · Do not close the head opening. The straps attach at this opening.
MAKE 2
Hanging Straps
Step-by-step
For each pink strap:
- 1. Ch 32.
- 2. Starting in the 2nd chain from the hook, sc across. [31 sts]
- 3. Fasten off with a sewing tail.
- 4. Attach one strap to each side of the head opening, opposite one another.
HOOKMUSE TIP
Match the attachment points so the finished fish hangs vertically.
MAKE 2
Side Fins
Step-by-step
For each pink fin:
- 1. Ch 10.
- 2. Starting in the 2nd chain from the hook, work sc across.
- 3. Continue shaping with increases and decreases worked evenly until the fin has a rounded shape.
- 4. Fasten off with a sewing tail.
- 5. Sew the fins to opposite sides where the pink and cream sections meet.
HOOKMUSE TIP
Use the first finished fin as a size template for the second.
NOTE · SOURCE LIMITATION: the original tutorial does not supply the exact fin shaping rows or final stitch counts.
MAKE 2
Tail Lobes
Step-by-step
For each pink tail lobe:
- 1. Ch 15.
- 2. Starting in the 2nd chain from the hook, sc across.
- 3. Shape the lobe by increasing and decreasing to form a rounded edge.
- 4. Make a second matching lobe.
- 5. Join the two narrow ends and attach the completed tail below the cream mesh body.
HOOKMUSE TIP
Before sewing, check that both lobes angle outward evenly.
NOTE · SOURCE LIMITATION: exact tail shaping counts are not stated in the source method.
FACE DETAILS
Eyes & Smile
Step-by-step
Eyes - make 2:
Begin each white eye with 6 sc in a magic ring. Increase around to form a small circle; the source does not state how many increase rounds to work.
Embroider a small black pupil on each eye.
Sew the eyes to the pink head.
Add an optional embroidered smile with black yarn or thread.
HOOKMUSE TIP
Place the eyes temporarily before sewing to choose the expression you like.
NOTE · SOURCE LIMITATION: the eye begins with 6 sc, but later eye-round counts are not specified.
FINAL ASSEMBLY
Finishing, Hanging & Loading
Step-by-step
- 1. Secure all joins.
- 2. Weave in every loose end.
- 3. Shape the fins and tail gently by hand.
- 4. Hang the fish from a sturdy hook or peg using the two pink straps.
- 5. Load folded plastic bags through the top head opening, following the source method.
Your pink + cream version is complete.
HOOKMUSE TIP
Keep the top opening easy to reach so refilling remains convenient.
NOTE · The pink colorway is a Hookmuse color adaptation requested by the user; its construction repeats the source blue version.
HOOKMUSE PATTERN GUIDE
Care, Shaping & Helpful Tips
Working tips · Care from the source
- Keep tension consistent so the mesh · For gentle care, use cold water. The openings stay even. · source suggests either hand washing with mild detergent or a gentle
- Count stitches and mesh spaces machine cycle inside a mesh laundry regularly. bag.
- Check that the starting chain is not Lay flat to dry and reshape as needed. twisted before joining. Store away from prolonged direct
- Weave ends securely. · sunlight to reduce fading.
- Light blocking can help the finished piece sit neatly.
NOTE · These care notes come from the source article and apply to both colorways.
HOOKMUSE PATTERN GUIDE
Source, Accuracy & Thank You
Pattern source
This Hookmuse booklet is a rewritten and reorganized reference based on the public tutorial Cute Smiling Fish Crochet Plastic Bag Dispenser Tutorial by MadeBy2Sisters, updated October 25, 2026.
The source provides exact counts for the mesh body, head shaping and straps, but only general shaping directions for the fins and tail, plus an incomplete count sequence for the eyes. Those limits are identified throughout this booklet rather than silently filled in.
Original source:
madeby2sisters.com/smiling-fish-crochet-plastic-bag-dispenser/
Thank you for crafting with Hookmuse
This PDF uses original Hookmuse branding and original/derived Hookmuse-generated visuals. It does not reproduce the source website’s photographs.
6 Toilet Paper Holder Crochet Patterns Bundle – Digital crochet pattern (PDF)